Stripe
SaaSBold comes with Stripe integration to manage payment and subscriptions. This guide covers setting up Stripe, creating subscription plans, generating keys, and configuring webhooks.
Overview
Stripe is a powerful payment processor that allows you to manage payment and subscriptions efficiently. This guide will show you how to set up Stripe, including creating subscription plans, generating required keys, and configuring webhooks.
Setting up Stripe account
If you don’t already have a Stripe account, head over to the Stripe and sign up for an account. Once your account is set up, follow these steps:
- Log in to your Stripe Dashboard
- Navigate to the Developers section
- Find your API keys (publishable key and secret key)
Save this keys in .env file.
NEXT_PUBLIC_STRIPE_PUBLISHABLE_KEY=
STRIPE_SECRET_KEY=Creating Subscription plans
Now that we got the keys, let’s create a subscription plan.
-
Login to your Stripe account.
-
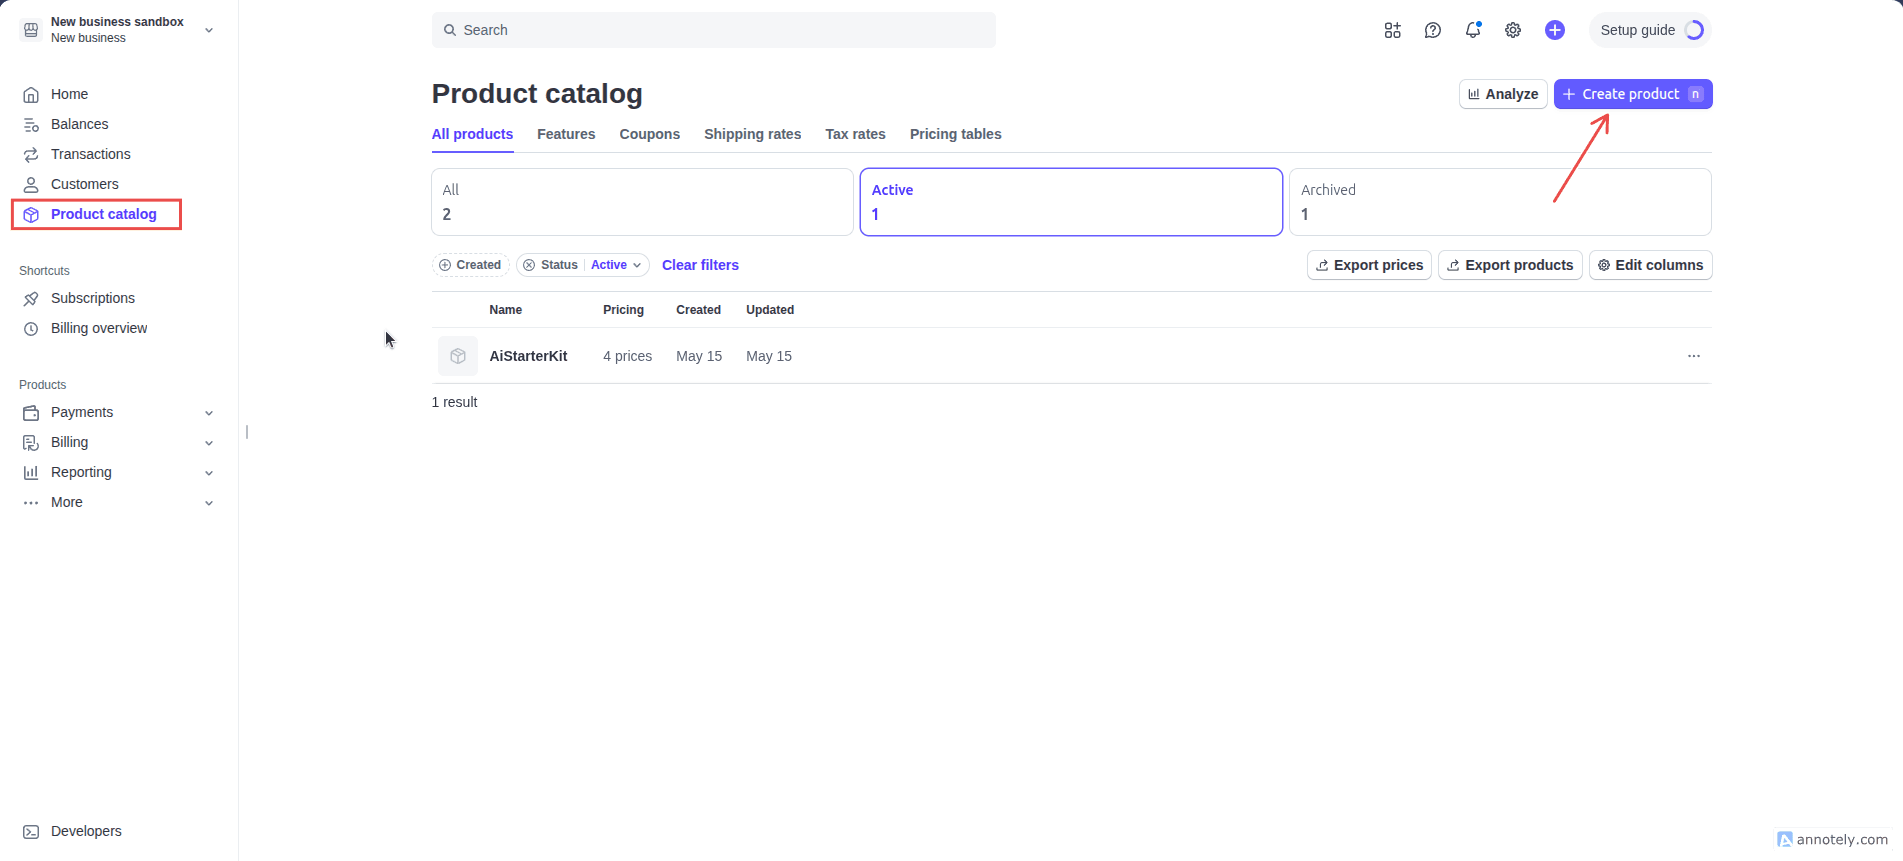
Go to the Products Catalog tab and click on the Create Product button.
-
Fill in the information: Add a pricing plan (we can add the rest later on) and choose recurring
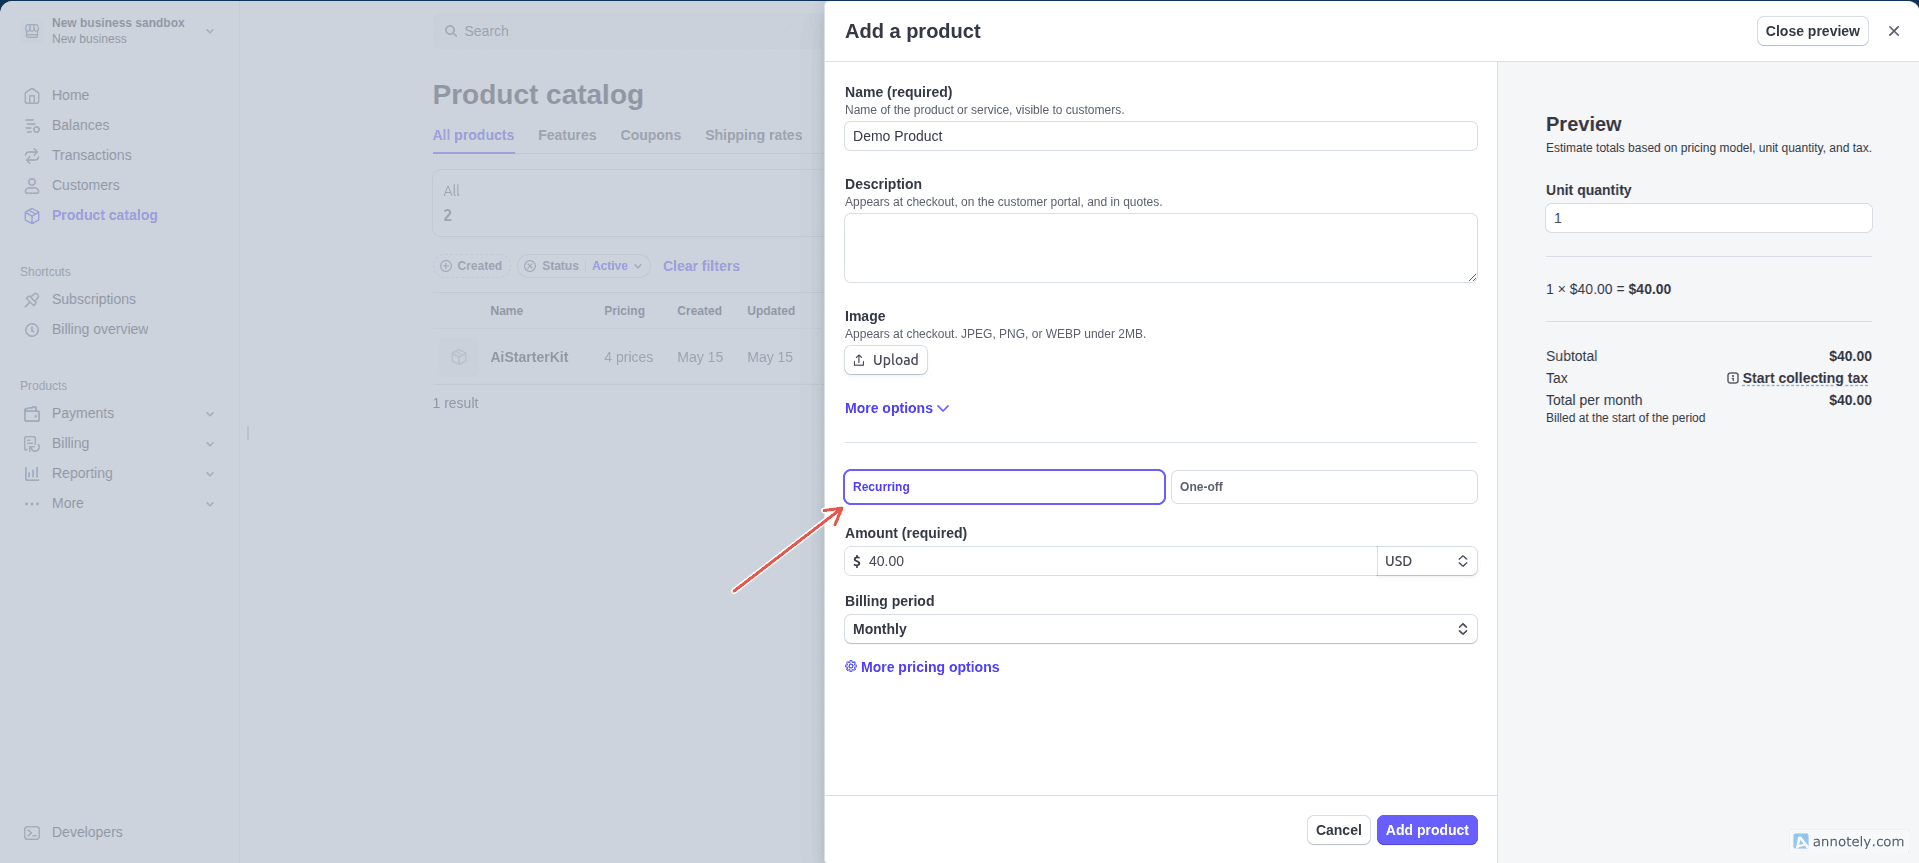
Now click on Add Product to save the details. You should see the new product you’ve just created being listed on the product catalog page. Click on the product to open its details page.
-
From the product details page copy the product id and store in your
.envfileSTRIPE_PRODUCT_ID=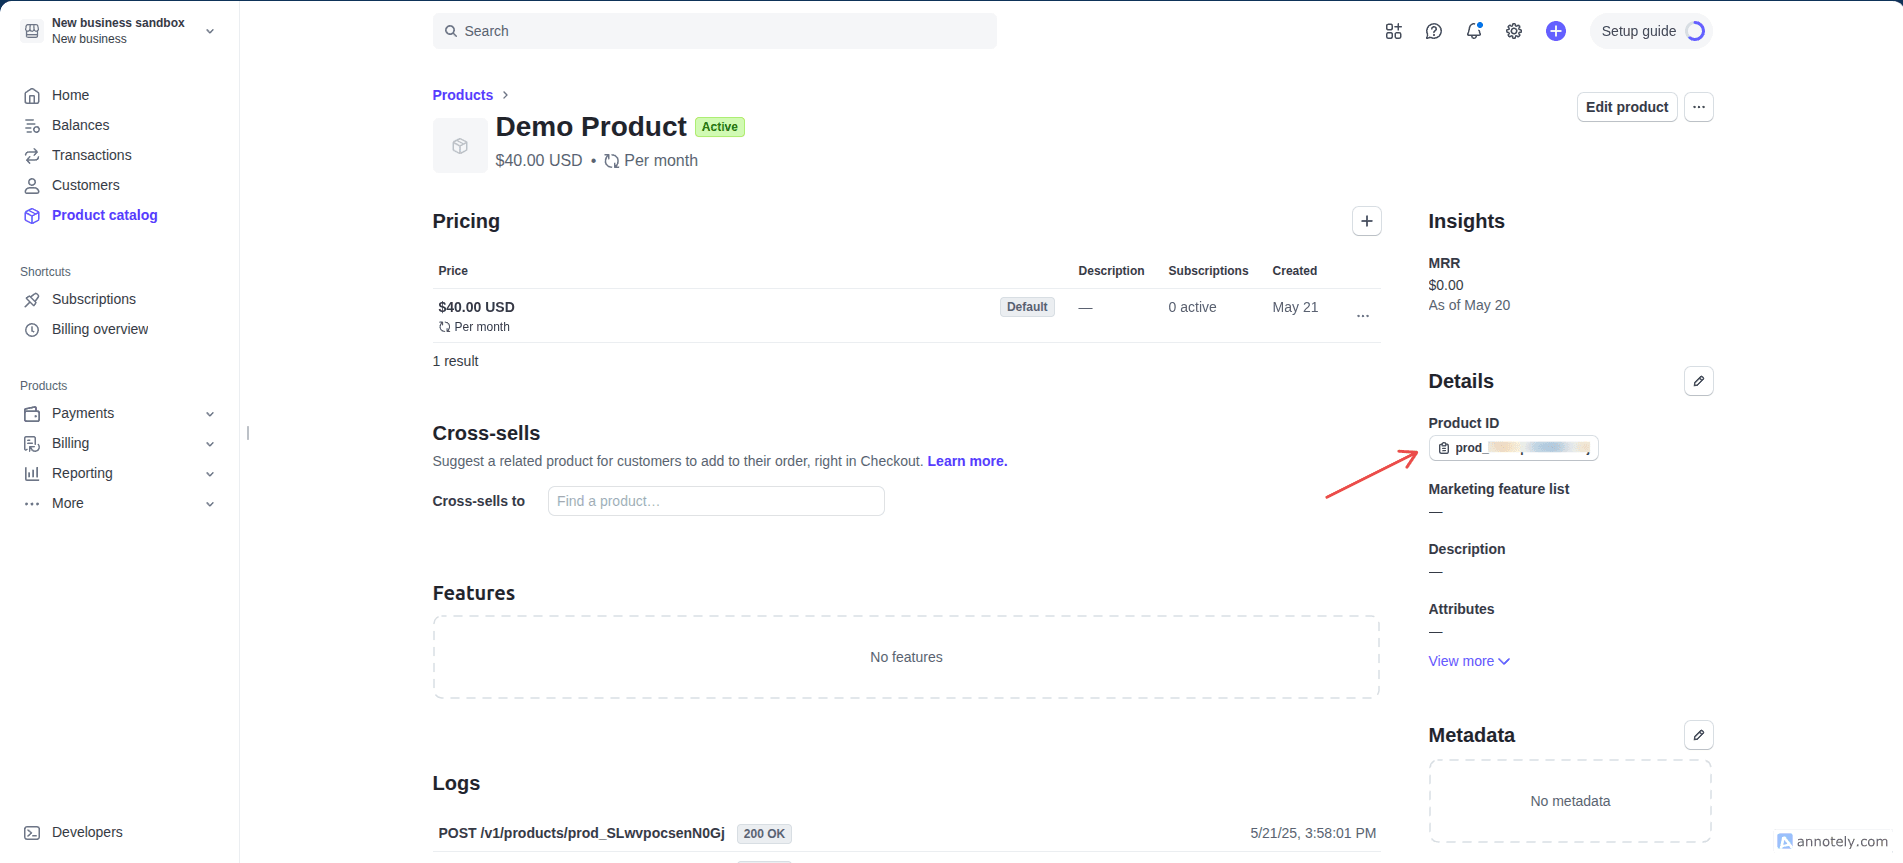
-
Add more subscription plans by clicking on the plus icon above the pricing table
-
Copy the price id for each plan and store in your
.envappropriatelyNEXT_PUBLIC_PLUS_MONTHLY_PRICE_ID= NEXT_PUBLIC_PLUS_YEARLY_PRICE_ID= NEXT_PUBLIC_PRO_MONTHLY_PRICE_ID= NEXT_PUBLIC_PRO_YEARLY_PRICE_ID=
On AiStarterKt, we have four pricing tiers(Free, Plus, Pro and Enterprise), among them the Plus and Pro tiers have monthly and annual based subscription. So for that we’ve named our environment variables
_[TIER]_MONTHLYand_[TIER]_YEARLY
Webhook Integration
First, we will see how to enable Webhook for testing locally, and then we will see how to enable it for production.
Local Development
-
Download the Stripe CLI and log in with your Stripe account
stripe login -
Forward events to your destination
stripe listen --forward-to localhost:3000/api/webhooks/stripeIt’ll start the webhook server and give us the webhook secret. Save the secret to your
.envfileSTRIPE_WEBHOOK_SECRET=TipAlternatively, you can run below command, which I’ve included the
package.jsonscripts, to start the webhook servernpm run stripe:listen
Webhook for production
-
From the bottom bar, go to Developer>Webhooks and click on the Add destination button.
-
Select API Version: Choose the Latest API version from the dropdown.
-
Select Events: You may click on Select all to select all events. But stripe recommends picking only the events your application listens to.
In our case, these are the events that are being listened in our application:
"checkout.session.completed"
"customer.subscription.updated"
"customer.subscription.deleted"
"invoice.payment_succeeded"
"invoice.payment_failed"
Filter the events list by searching using the above list and click on the checkmark. You can watch the video for better visualization
-
Choose destination type to Webhook endpoint and click Continue
-
Fill in the required fields
- Add destination name
- The endpoint url, e.g.
https://yoursite.com/api/webhooks/stripe
Click on create destination and copy the Signing secret. Store the secret in your
.envfileSTRIPE_WEBHOOK_SECRET=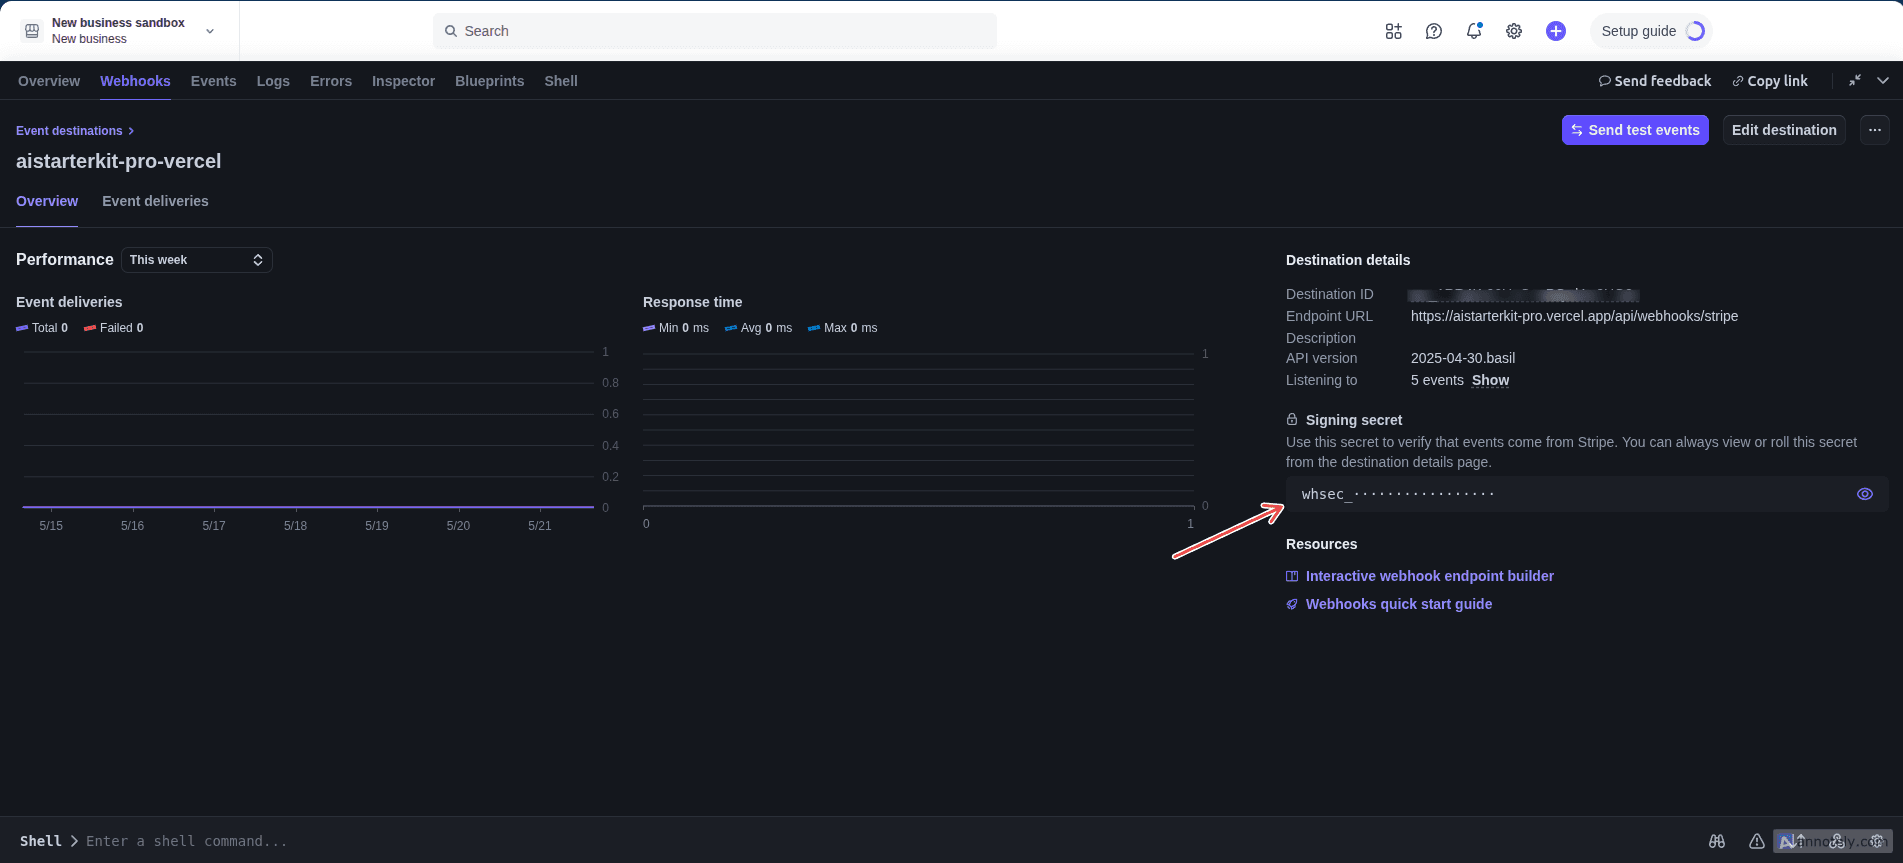
Testing Payments
To test Stripe payments, use the following test card details:
- Card Number:
4242 4242 4242 4242 - Expiration: Any future date
- CVC: Any 3-digit number